RabbitMQ
Overview
RabbitMQ is lightweight and easy to deploy both on-premises and in the cloud. It supports multiple messaging protocols. RabbitMQ can be deployed in distributed and federated configurations to meet high-scale, high-availability requirements.
Integration Manager is compatible with RabbitMQ 3.9 or higher. RabbitMQ 3.9 requires Erlang OTP 24. The following steps apply only to a single-node RabbitMQ installation.
Integration Manager is also fully compatible with clustered RabbitMQ deployments. For reference information, see the official RabbitMQ clustering guide: https://www.rabbitmq.com/clustering.html
Steps 1-4 are for Windows installation only. For Linux instructions, please see the official RabbitMQ documentation, then skip to Step 5:
- RPM-based: https://www.rabbitmq.com/install-rpm.html
- Debian/Ubuntu: https://www.rabbitmq.com/install-debian.html
Step 1: Install Erlang OTP
- Download Erlang OTP 24 for Windows: https://github.com/erlang/otp/releases/download/OTP-24.2.1/otp_win64_24.2.1.exe
- Right-click the installer and select Run as administrator.
- Install using the default configuration (approximately 350MB).
Step 2: Install RabbitMQ
- Download RabbitMQ 3.9 for Windows: https://github.com/rabbitmq/rabbitmq-server/releases/download/v3.9.13/rabbitmq-server-3.9.13.exe
- Right-click the installer and select Run as administrator.
- Install using default configuration (approximately 30 MB).
- Choose "Allow access" for "Domain networks..." in Windows Defender Firewall, if prompted.
Step 3: Verify RabbitMQ Service
- Go to Windows → Services.
- Confirm that the RabbitMQ service is registered and running.
Step 4: Configure RabbitMQ Console
-
Open a Windows console.
-
Go to the sbin directory:
cd "C:\Program Files\RabbitMQ Server\rabbitmq_server-3.9.13\sbin" -
Enable the rabbitmq_management plugin:
.\rabbitmq-plugins enable rabbitmq_management
If you have any issues with the installation, please refer to the official RabbitMQ documentation: https://www.rabbitmq.com/install-windows.html.
Step 5: Configure RabbitMQ User(s)
-
Open a browser window.
-
Go to: http://localhost:15672/.
-
Login (first time):
- Username: guest
- Password: guest
-
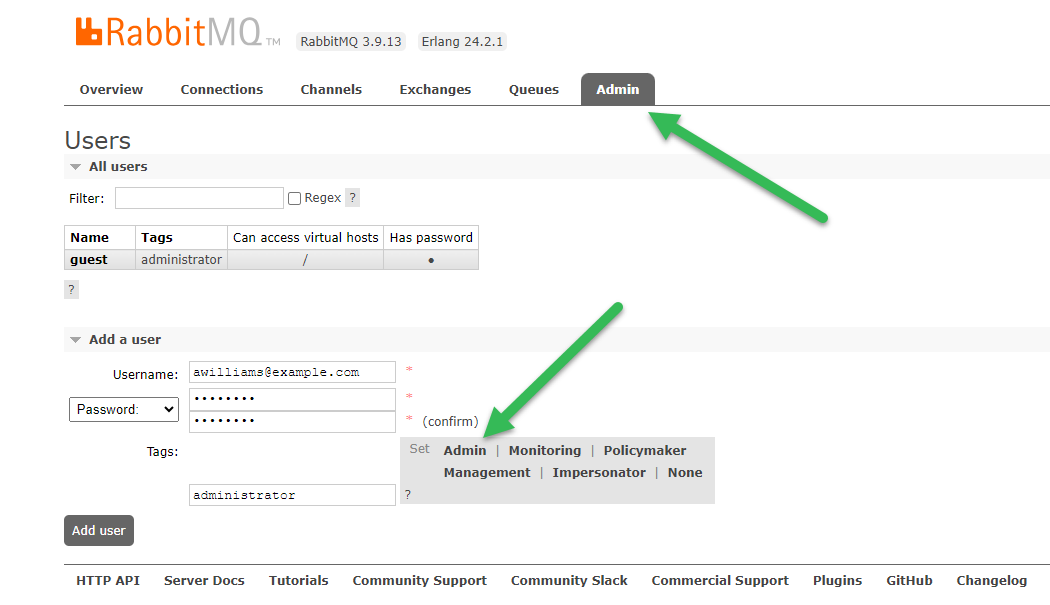
Click the Admin tab.
-
Click Add a user.
-
Add credentials for Integration Manager (username/password).
-
Click the Admin tag. This adds administrator to the Tags field:

-
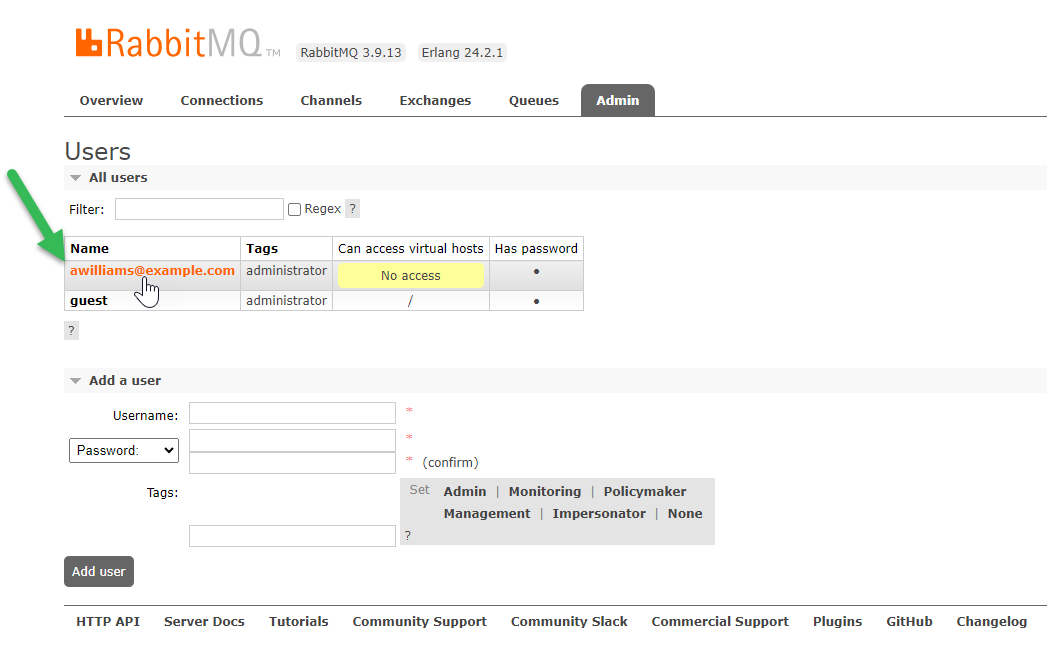
Click Add user.
-
The user is added with no access to virtual hosts. Click the username:

-
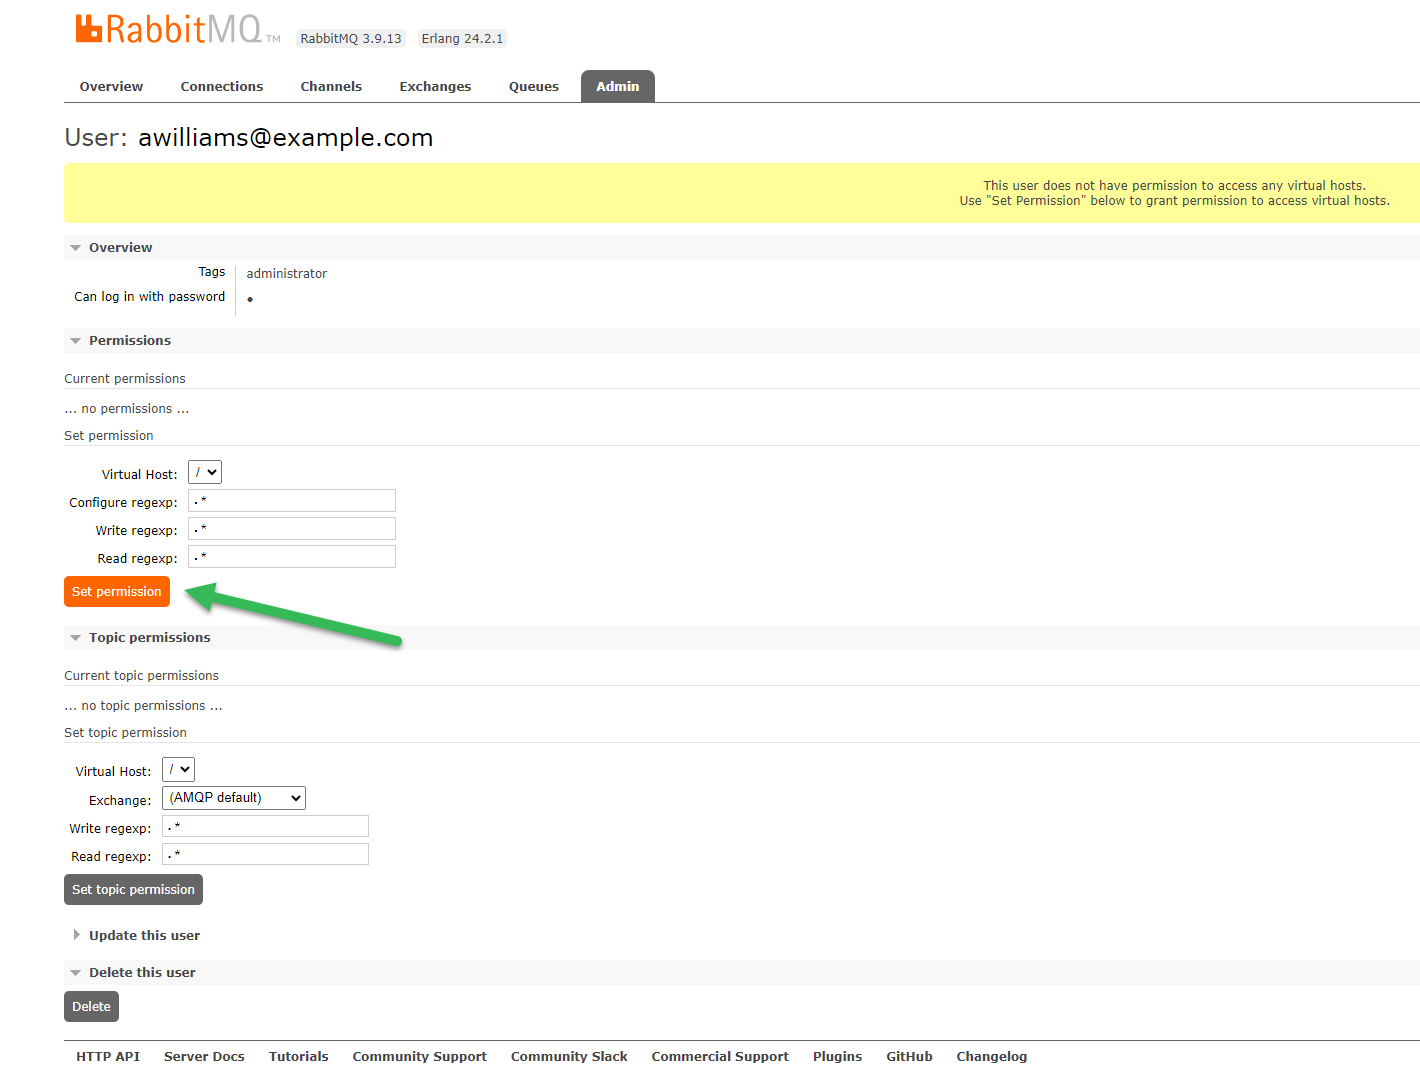
Click Set permission to grant access to virtual hosts:

-
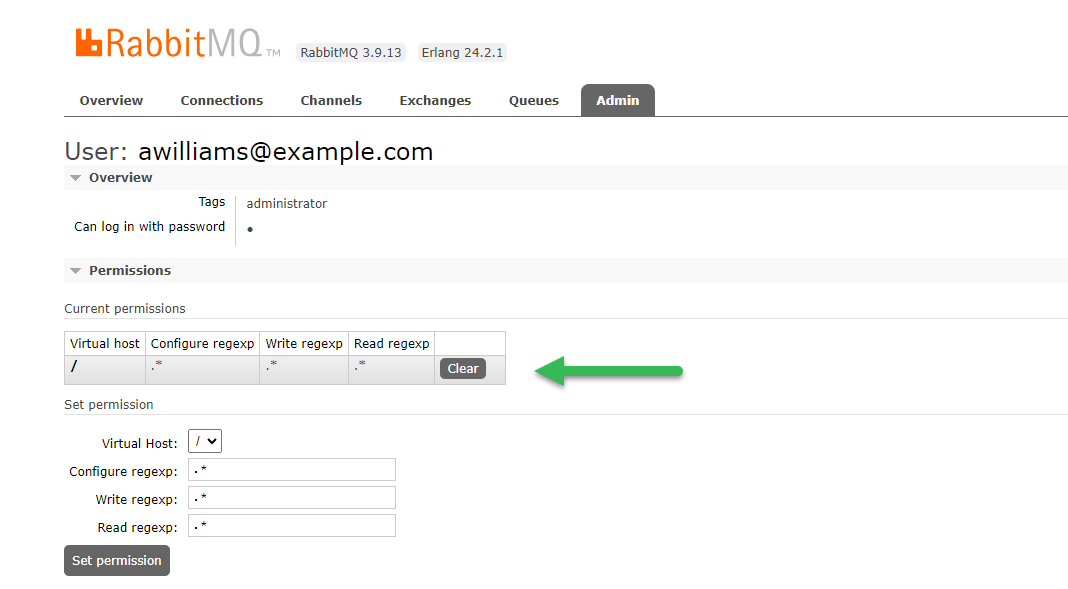
The user now has access to virtual hosts:

Step 6: Configure Integration Manager Queue Properties
Integration Manager uses the "queue" prefix properties in the /conf/application.properties file to connect to the RabbitMQ broker.
queue.port is for the messaging port (default: 5672) and is different from the management API/console port (default: 15672)
Any change to application.properties requires a restart of the Integration Manager Service.
Here are example properties to connect Integration Manager to a RabbitMQ Server:
# Messaging Configuration
queue.host=RABBITMQ_HOSTNAME
queue.port=5672
queue.username=RABBITMQ_USERNAME
queue.password=RABBITMQ_PASSWORD
queue.connectionTimeout=20
queue.management-url=http://RABBITMQ_HOSTNAME:15672
Enabling TLS for RabbitMQ
If you have a cloud or inter-network installation, then you should enable TLS for RabbitMQ: https://www.rabbitmq.com/ssl.html.
You will also need to add SSL properties to the Integration Manager messaging configuration:
queue.ssl.enabled=true
queue.ssl.key-store=KEYSTORE FILE LOCATION
queue.ssl.key-store-password=KEYSTORE_PASSWORD
queue.ssl.key-store-type=KEYSTORE_TYPE, e.g. PKCS12
queue.ssl.protocol=TLSv1.2