User Management
Administrators can create and manage users within the Administration Console. Note that User Management requires Account admin access.
Account administrators can:
- Add a new user
- Activate/Inactivate a user
- Edit user profile information
- Enable direct API access for a user (where required)
- Create, generate, or reset the API password for a user
- Enable/Disable admin access for a user
Adding a New User
-
Click the profile dropdown in the upper right corner and select Administration.

-
Click
 :
:
-
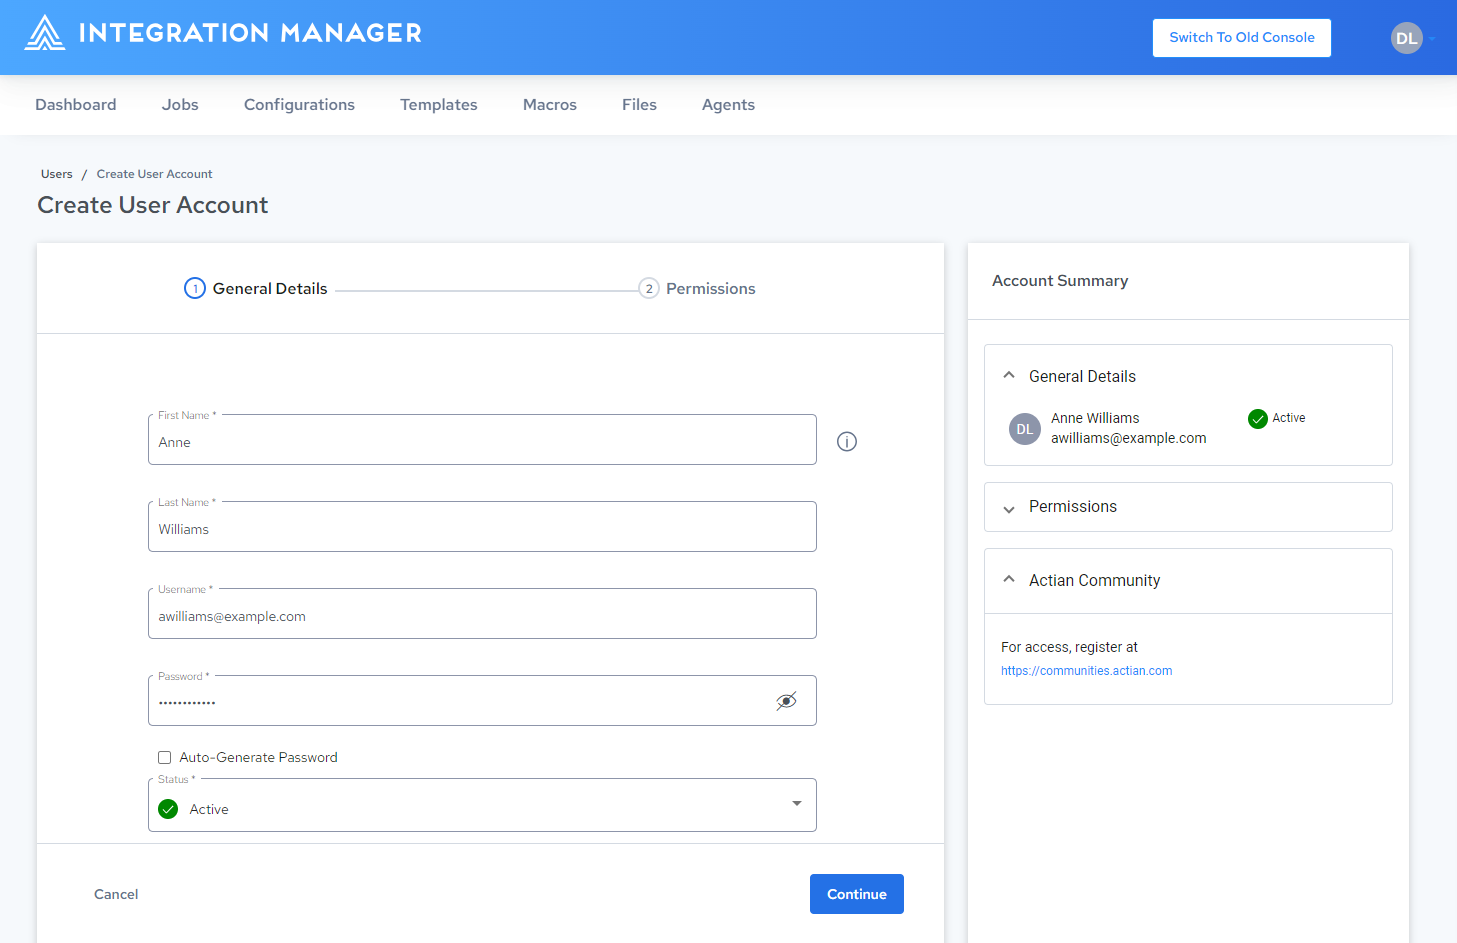
On the Create User Account page, enter the First Name and Last Name.
-
In the Username field, enter the user's email address as the username.
noteUsernames cannot be changed once created, they can only be deactivated.
-
In the Password field, enter a password manually or select Auto-Generate Password.
-
In the Status field, Active is selected by default. If you do not yet want the user account to be active, select Inactive.
-
Click
 .
. -
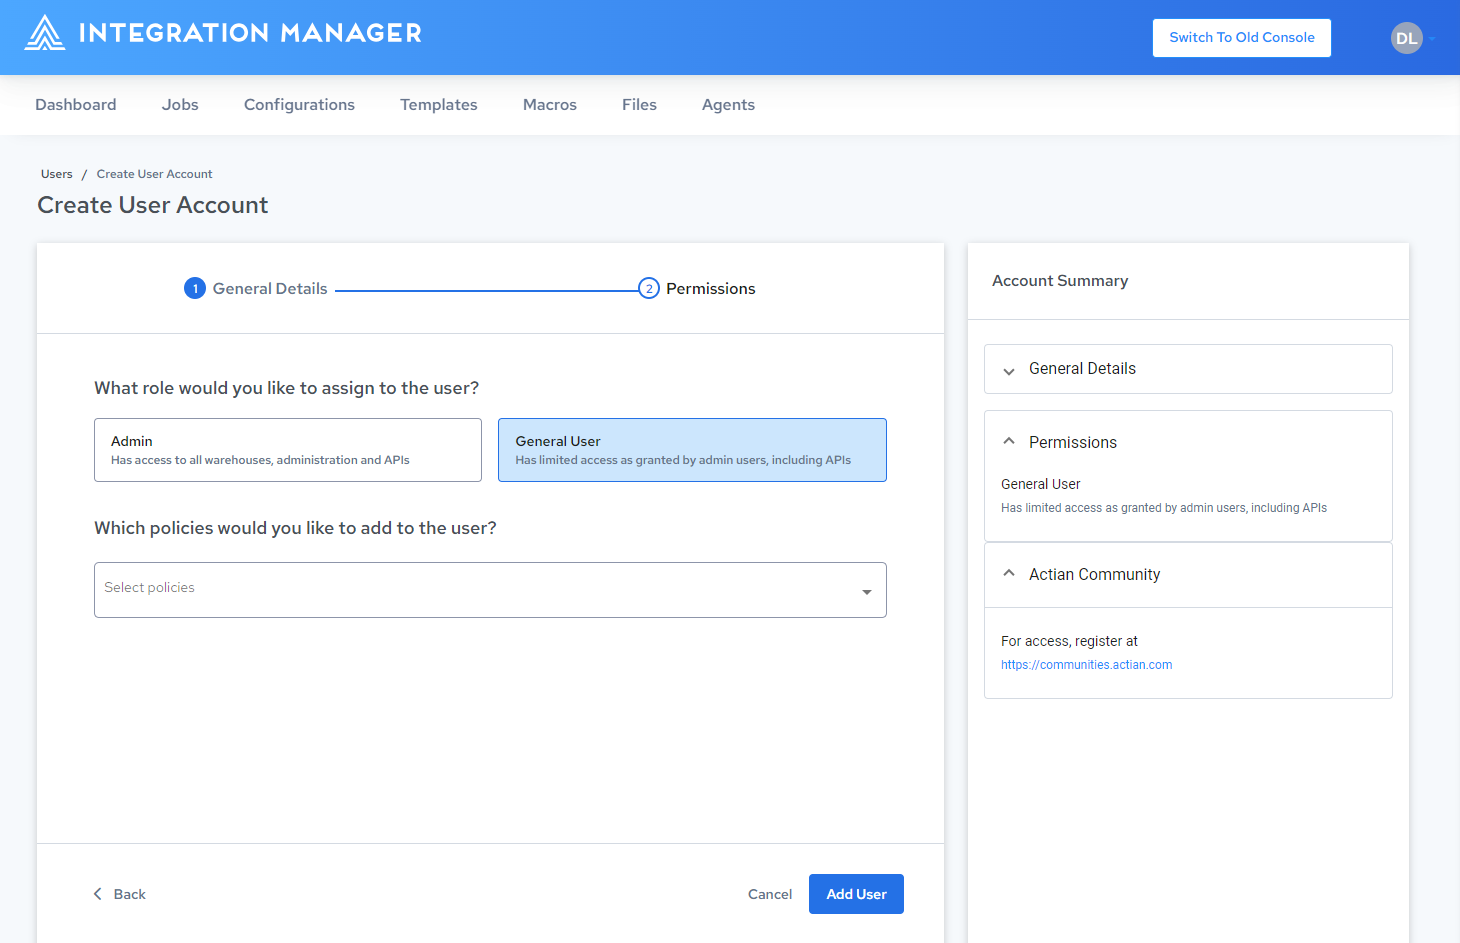
Under What role would you like to assign to the user?, click Admin or General User.
-
If you selected General User, click the Select policies dropdown and select the desired policy. See Access Control Policies.
-
Click
 .
.
Activating or Inactivating a User
-
Click the profile dropdown in the upper right corner and select Administration.

-
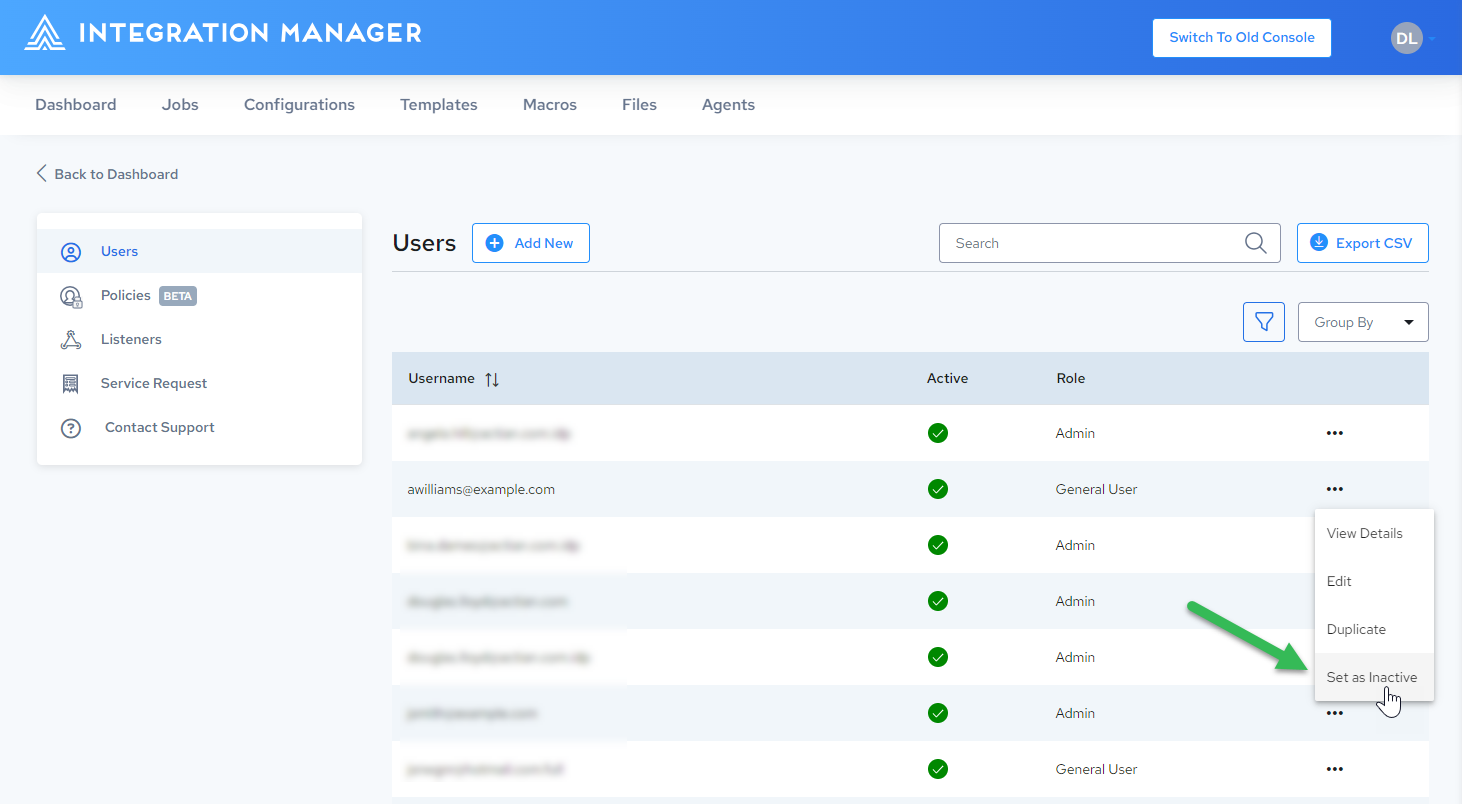
Click the ellipsis icon in the right column for the desired user and select Set as Active or Set as Inactive.
Editing User Profile Information
-
Click the profile dropdown in the upper right corner and select Administration.

-
Click the ellipsis icon in the right column for the desired user and select Edit.
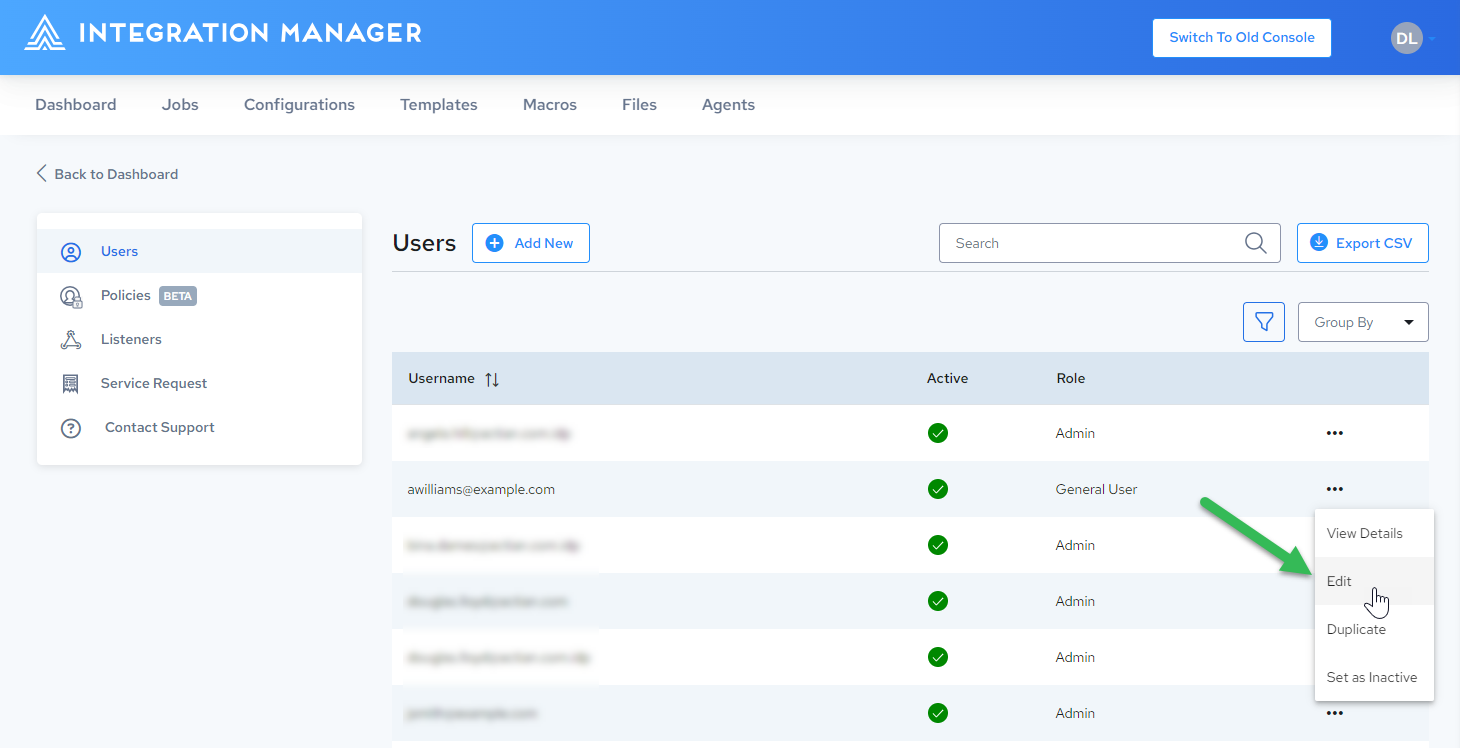 note
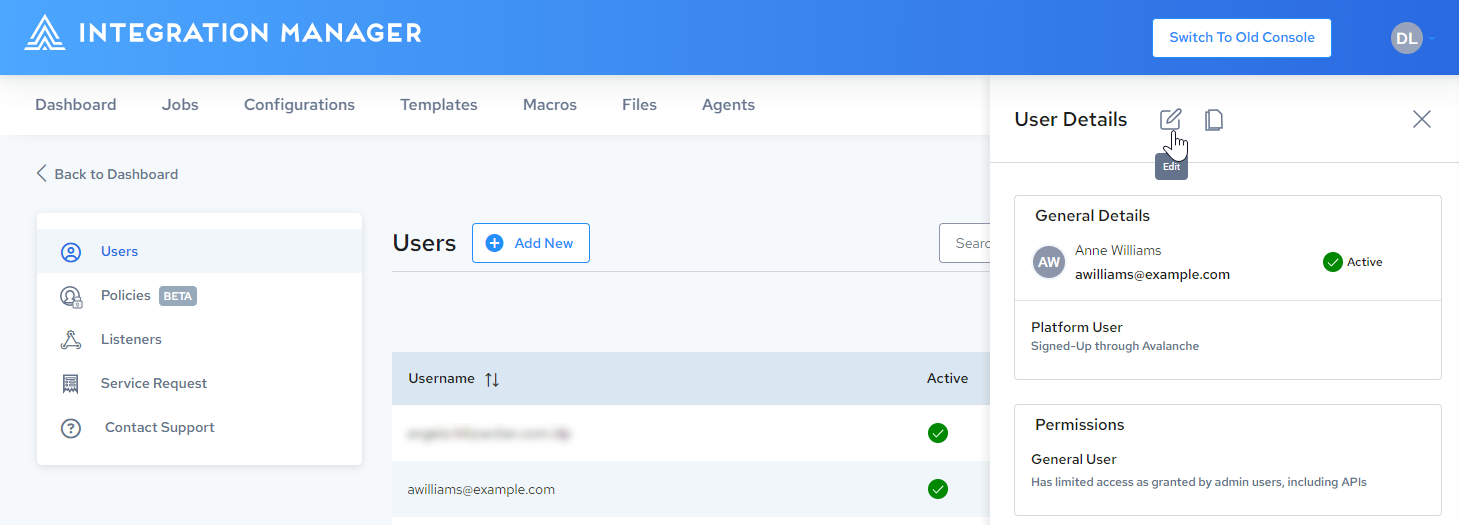
noteYou can also click the Username for the desired user and then click
 in the User Details pane:
-
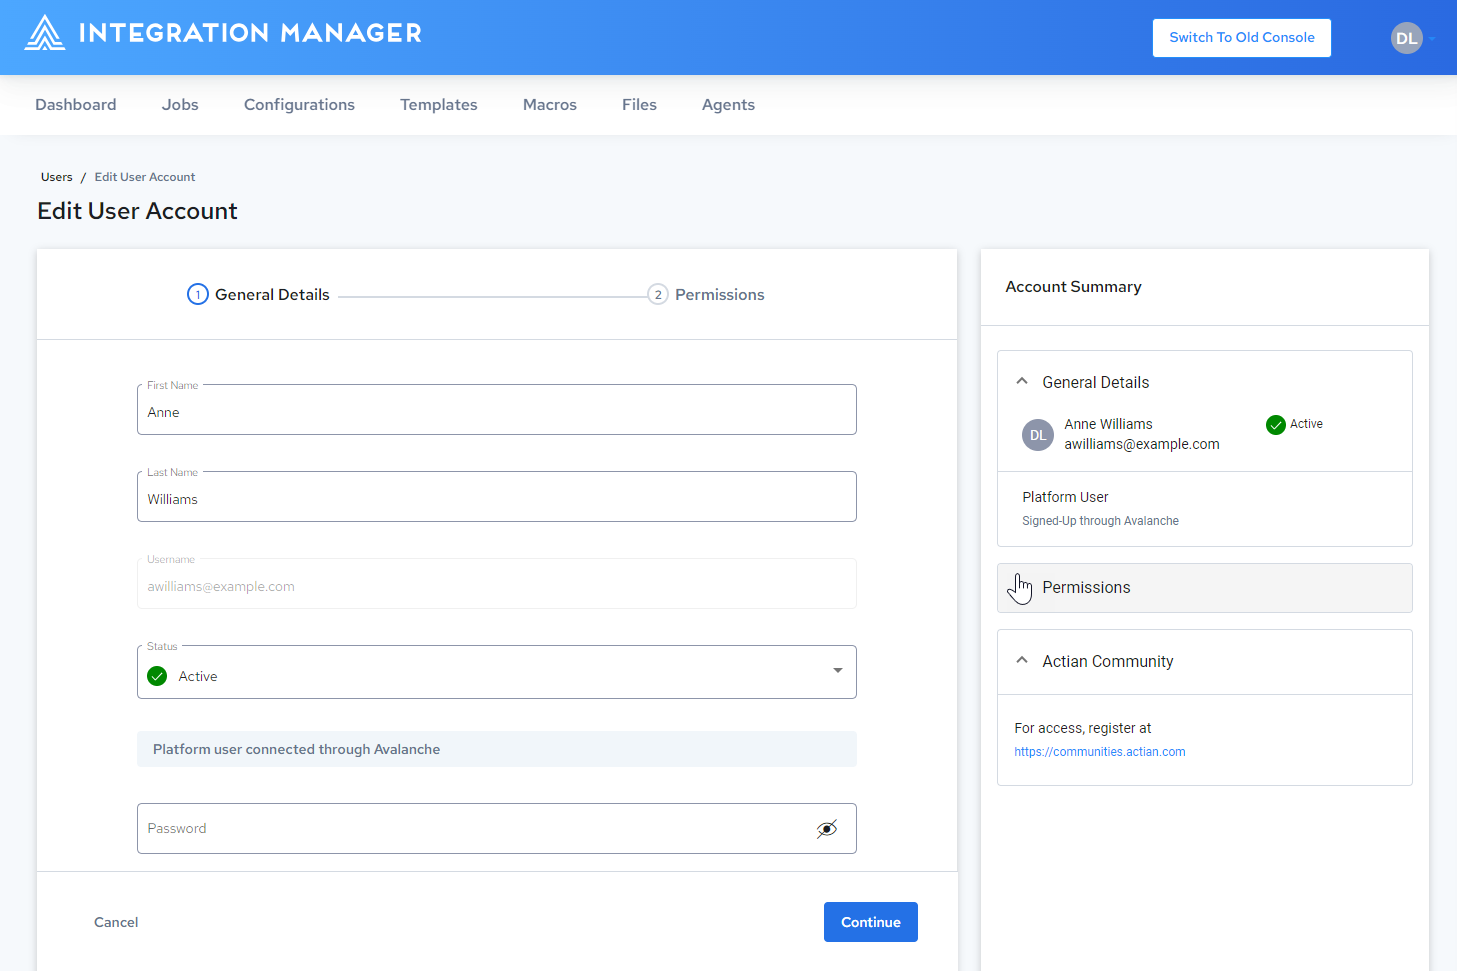
On the Edit User Account page, edit the user's first and last name, status, and password:
 note
noteUsernames cannot be changed once created, they can only be deactivated.
noteUsers (admin and non-admin alike) are not allowed to activate/deactivate, or enable/disable admin access for themselves.
-
Click
 .
. -
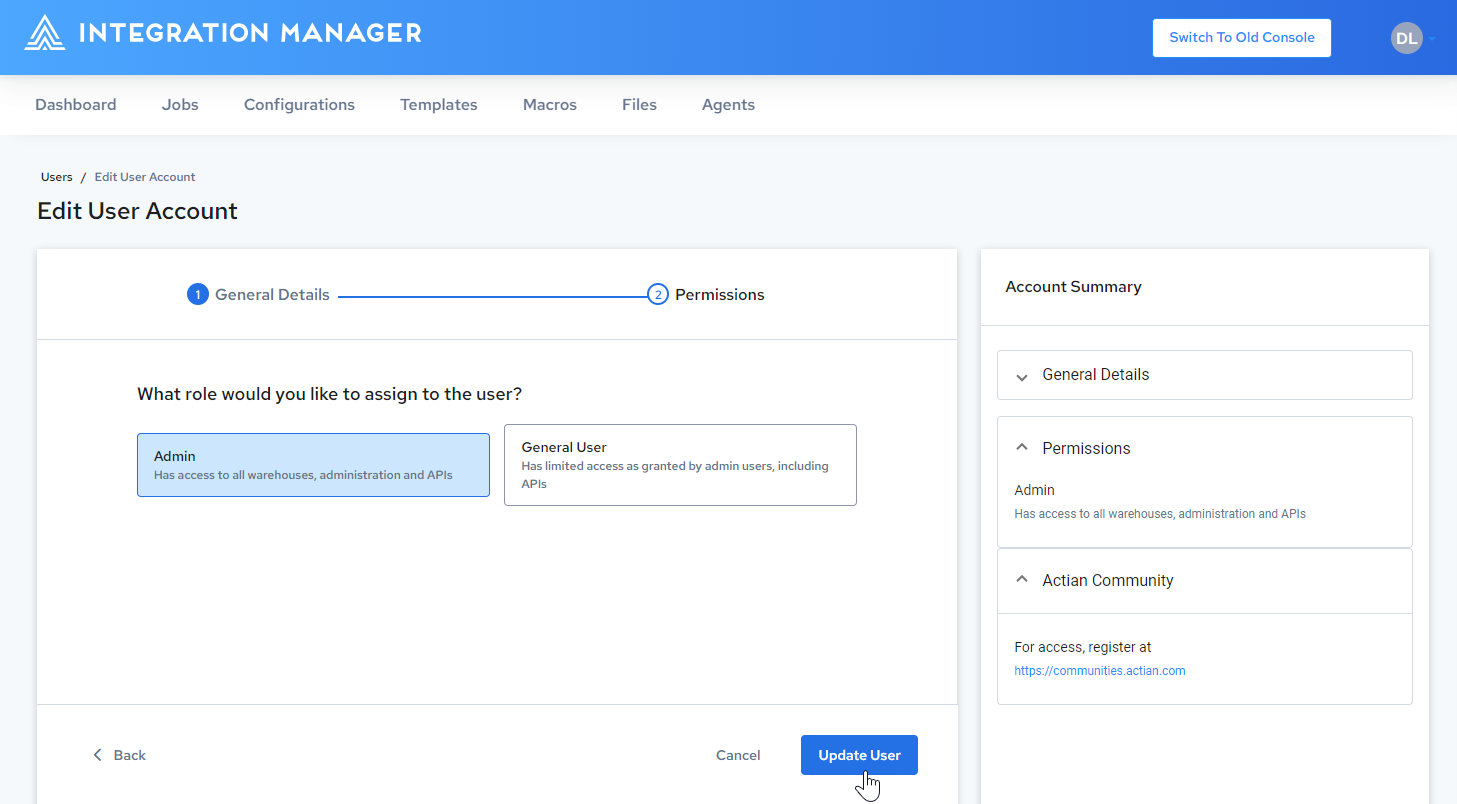
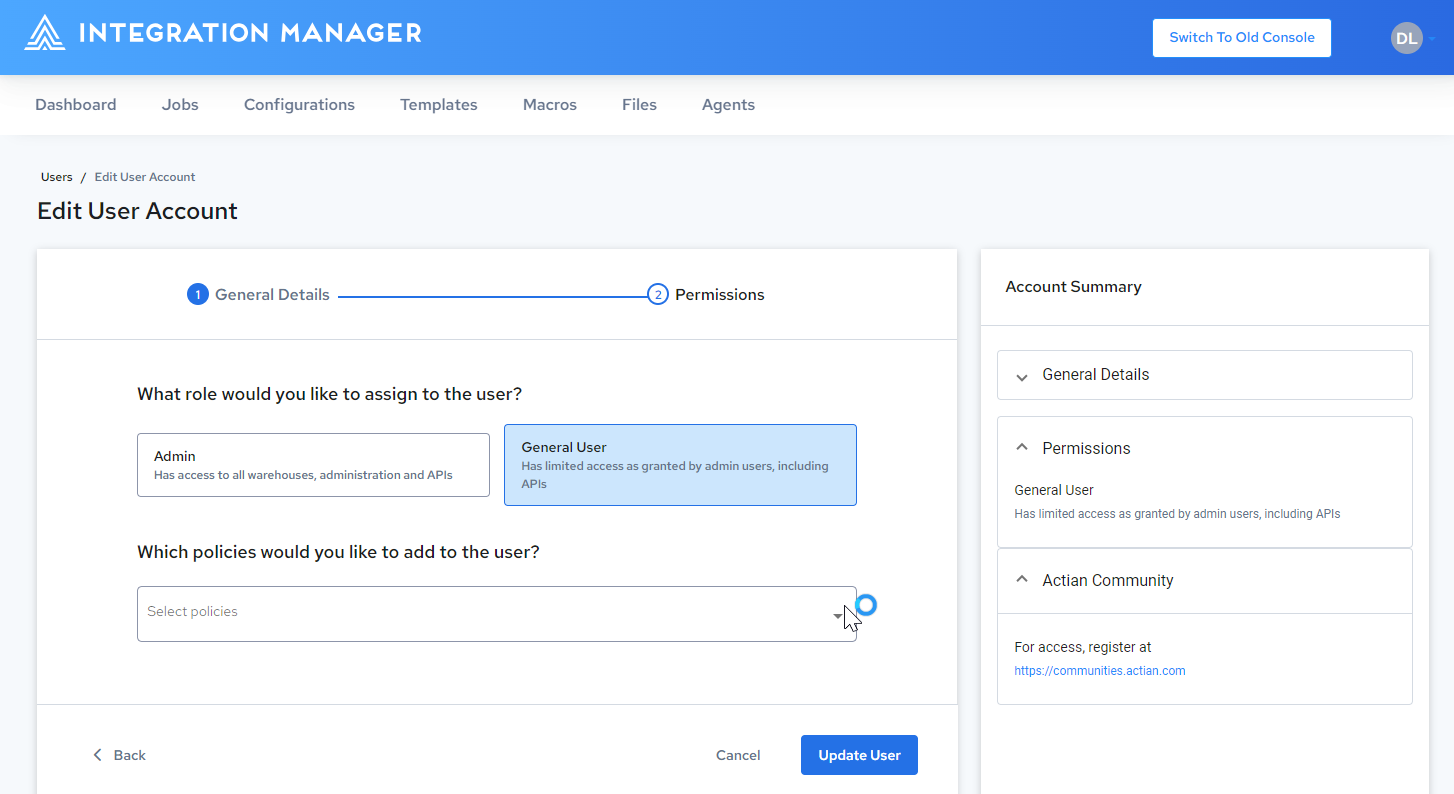
Under What role would you like to assign to the user?, click Admin or General User.
-
If you selected General User, click the Select policies dropdown and select the desired policy. See Access Control Policies.
-
Click Update User.
Enabling/Disabling Admin Access
-
Click the profile dropdown in the upper right corner and select Administration.

-
Click the ellipsis icon in the right column for the desired user and select Edit.

-
Click
 .
. -
Click Admin or General User, then click Update User.
